
Picture this: it’s a sweltering summer afternoon, the sun is beating down, and you’re halfway through a crucial work call. You glance out the window and see your beloved petunias wilting, their once vibrant petals drooping sadly. The thought of lugging hoses or setting up sprinklers feels like climbing Everest. Sound familiar? For years, I’ve been there, wrestling with unreliable timers and uneven watering, always feeling like I was either overdoing it or underdoing it. But then I discovered the magic of a properly installed garden irrigation system, and let me tell you, it’s a game-changer. It’s not just about convenience; it’s about giving your plants exactly what they need, when they need it, and doing it all with remarkable efficiency. So, if you’re tired of the daily watering chore and dreaming of a consistently lush garden, let’s dive into how to install a garden irrigation system.
Why Bother With an Irrigation System? Let’s Talk Benefits!
Before we get our hands dirty with the “how,” it’s worth remembering why this is such a smart move. Forget the image of overly complex machinery; modern systems are surprisingly user-friendly and incredibly effective.
Water Efficiency: This is a big one. Sprinklers can lose a lot of water to evaporation and wind. Drip irrigation, for instance, delivers water directly to the plant roots, minimizing waste. You’ll be amazed at how much less water you use.
Healthier Plants: Consistent, appropriate watering is key to plant health. No more soggy roots or parched soil! Plants receive the hydration they need for stronger growth, better flowering, and increased resistance to pests and diseases.
Time and Effort Saved: This is the immediate, palpable benefit. Imagine reclaiming those precious hours spent watering each week. Think of the extra time you’ll have for other gardening joys, or simply for yourself!
Flexibility and Control: You can tailor watering schedules to specific plant needs, soil types, and even weather conditions. Many systems can be programmed, automated, and even controlled remotely.
Planning Your System: The Foundation for Success
This is where the real magic begins, and it’s less daunting than you might think. Thinking through your garden’s needs is crucial.
#### Mapping Your Watering Zones
First, grab a pencil and paper and sketch out your garden. Now, think about different areas. Do you have a shady spot with delicate ferns, a sunny vegetable patch, or a row of thirsty shrubs? These are your watering zones. Each zone might need a different amount or type of watering. For example, your lawn might need a different approach than your flower beds.
#### Choosing Your System Type
There are a few main types of irrigation systems to consider:
Drip Irrigation: This is my personal favorite for beds and vegetable gardens. Tiny emitters deliver water slowly and directly to the soil around plant roots. It’s incredibly water-efficient and minimizes weed growth because it doesn’t wet the surrounding soil.
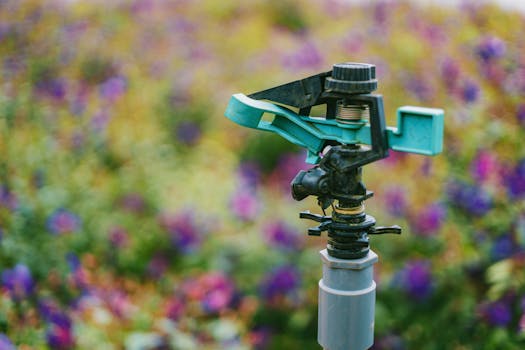
Sprinkler Systems: These are common for lawns and larger areas. You can choose between pop-up sprinklers that disappear when not in use, or above-ground sprinklers.
Soaker Hoses: A simpler, more budget-friendly option that slowly seeps water along its length. Great for rows of plants or flower beds.
For many of us, a combination of drip and sprinkler systems might be the ideal solution.
Gathering Your Gear: What You’ll Need
Once you’ve got a plan, it’s time to shop. Don’t worry, you won’t need a contractor for most DIY installations. Here’s a general rundown of what you might need when you decide how to install a garden irrigation system:
Water Source Connection: This usually connects to your outdoor faucet. You’ll need a backflow preventer (important for safety!), a filter to keep debris out, and a pressure regulator to ensure consistent water flow without damaging your system.
Piping/Tubing: The main arteries of your system. This could be PVC pipes for underground systems or flexible poly tubing for drip lines.
Emitters, Sprinkler Heads, or Soaker Hoses: These are the devices that actually deliver the water.
Fittings and Connectors: Elbows, tees, couplings – these join your pipes and tubing together.
Valves: To control the flow of water to different zones. You might have manual valves or an automatic controller.
Timer/Controller: This is the brain of your operation, allowing you to schedule watering times and durations.
Tools: A shovel or trenching tool (if going underground), pipe cutter, measuring tape, and possibly a screwdriver.
The Installation Process: Step-by-Step
Alright, let’s get down to the nuts and bolts of how to install a garden irrigation system.
#### 1. Layout and Trenching (If Applicable)
If you’re burying pipes, mark out your layout according to your plan. Dig trenches that are deep enough to protect the pipes but not so deep that they’re impossible to work with. Usually, 6-8 inches is sufficient for main lines.
For surface-level drip systems, you’ll lay out your tubing and emitters directly on the soil surface or a few inches below mulch.
#### 2. Connecting to the Water Source
This is usually the first connection. Attach your backflow preventer, filter, and pressure regulator to your outdoor faucet. Ensure all connections are snug to prevent leaks.
#### 3. Laying the Main Lines
Connect your main water supply line to the regulator. Run this main line to the areas of your garden that need water, branching off to your different zones. Use your fittings to make turns and connections.
#### 4. Installing Zone Valves
If you have multiple zones, you’ll need to install valves. These are typically placed after the main line, with each valve controlling a specific zone. If you’re using an automatic controller, these valves will connect to it.
#### 5. Running Distribution Lines and Emitters/Sprinklers
Now, run your smaller distribution tubing from the zone valves to the specific plants or areas.
For drip systems, punch holes in the tubing and insert emitters near the base of each plant.
For sprinkler systems, install your sprinkler heads at appropriate intervals, ensuring they cover the intended area without spraying sidewalks or buildings.
#### 6. Testing and Adjusting
Once everything is connected, turn on the water slowly. Check every single connection for leaks.
Turn on each zone individually to ensure it’s working correctly and that the water is reaching all the plants. Adjust sprinkler heads as needed for optimal coverage.
* Program your timer/controller according to your plants’ needs and your local climate.
Ongoing Care and Optimization
Installing the system is a huge win, but a little ongoing care will keep it running smoothly for years. Periodically check your emitters or sprinkler heads for clogs or damage. You might need to adjust your watering schedule as the seasons change. Over time, you’ll get a feel for what your garden truly needs, and your irrigation system will become an intuitive extension of your green thumb.
Wrapping Up: The Gift of a Thriving Garden
Honestly, the feeling of relief and satisfaction that comes from having a well-watered garden without the daily grind is immense. It’s an investment in your plants’ health and your own peace of mind. So, if you’ve been on the fence about how to install a garden irrigation system, I wholeheartedly encourage you to take the plunge. Start small if you need to, perhaps focusing on a specific bed or zone, and expand as you gain confidence. You’ll be amazed at the difference it makes – your plants will thank you for it, and so will your free time!